In This Article
A vanity sink leak is the leak you do not see coming. It hides inside a dark cabinet, behind the cleaning supplies, slowly dripping onto the cabinet floor for weeks or months. Most homeowners discover it only when the cabinet bottom feels soft, the doors swell shut, or a musty smell fills the bathroom. By then, the repair bill often includes the cabinet, the flooring, and sometimes the wall behind it.
The good news: almost every vanity leak starts in one of a handful of places, and most are simple to find and fix. This guide walks through the common causes, a quick diagnosis routine, the fixes that last, and how to tell when the problem has grown past the sink itself.
Early Signs of a Vanity Sink Leak
Because the leak is hidden inside the cabinet, you have to read the clues. Check inside your vanity every few months, and act on any of these:
- A musty or sour smell when you open the cabinet doors. Odor is often the first sign, appearing long before visible water.
- Warped, bubbled, or discolored cabinet flooring. Particle board swells and delaminates quickly once it gets wet.
- Water stains or rings on stored bottles, the cabinet walls, or items kept under the sink.
- Dampness around the base of the vanity on the bathroom floor, or baseboards that have swollen near the cabinet.
- Dripping sounds after the faucet is turned off, or the sound of water running when no tap is open.
- Mold spots on the cabinet interior, the wall behind the vanity, or the caulk line where the vanity meets the wall.
Put a cheap leak detector or even a folded paper towel under the pipes and check it monthly. Thirty seconds of prevention beats a cabinet replacement.
The Most Common Vanity Sink Leak Causes
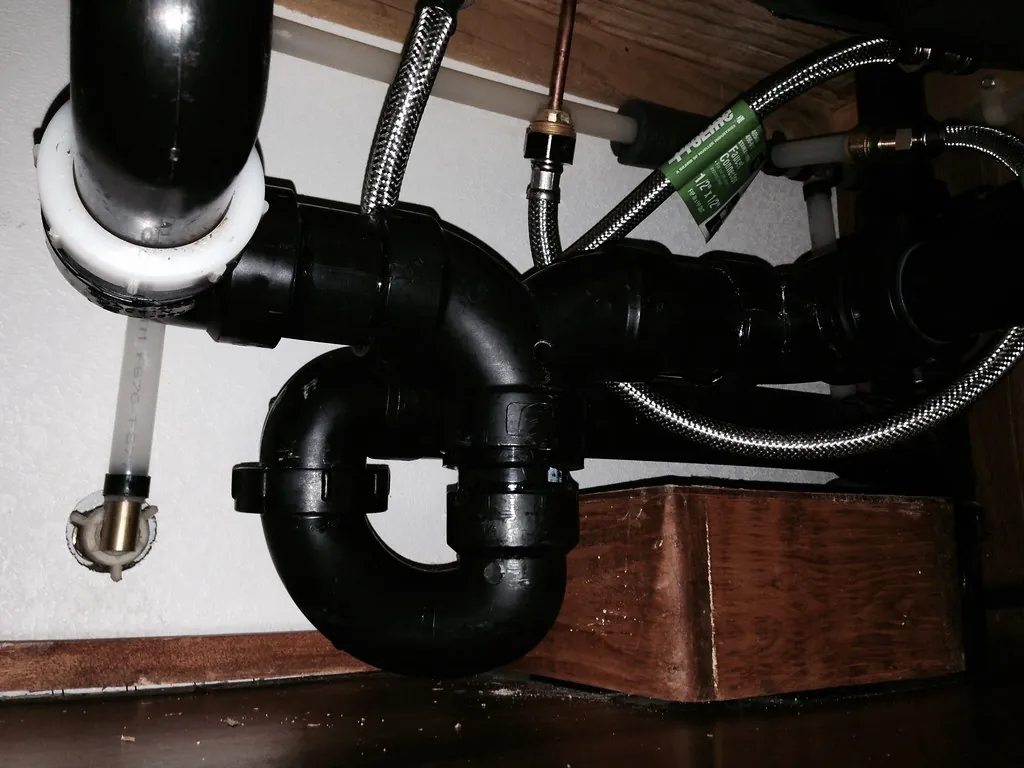
A bathroom vanity has more leak points than most people realize: supply lines, shutoff valves, the drain assembly, the P-trap, the faucet base, and the seals where everything meets. Here are the failures we see most often:
- Loose or corroded supply line connections. The braided hoses that connect the faucet to the wall valves can work loose over time, especially after work has been done under the sink. Old rubber supply hoses crack and burst; braided stainless steel lasts far longer.
- Worn P-trap slip nuts. The curved P-trap under the sink connects with plastic or metal slip nuts. These loosen from vibration and temperature changes, and the washers inside them flatten with age. A slow drip from a slip nut is the single most common vanity leak.
- Drain flange and pop-up assembly seals. The drain flange sits in the sink bowl sealed with plumber's putty or silicone. When that seal breaks down, water seeps around the drain each time the sink fills, running straight into the cabinet.
- Faucet base and O-ring failure. Water that splashes around the faucet can work under a failed base gasket and drip down the back of the sink into the cabinet, or worse, into the wall cavity.
- Failed shutoff valves. The small valves on the wall supply pipes seize, corrode, and develop slow seeps at the stem. They also fail exactly when you need them most, so test them periodically.
- Over-tightened fittings. This one surprises people. Cranking a plastic slip nut too hard cracks it, and crushing a rubber washer deforms it into a leak path. Hand-tight plus a quarter turn is usually the right spec for plastic trap parts.
- Cracked sink or tailpiece. Porcelain hairline cracks and cracked plastic tailpieces leak intermittently, which makes them harder to catch. They often only drip when the sink is full and draining.
How to Diagnose the Source in 10 Minutes
You do not need special tools to find most vanity leaks. Clear out the cabinet, lay down dry towels or paper under everything, and work through this sequence:
- Dry everything first. Wipe down all pipes, the cabinet floor, and the wall behind the vanity so old moisture does not confuse the test.
- Run the faucet with the stopper open. Watch the supply lines, shutoff valves, and faucet base while water runs. Leaks here mean a supply-side problem.
- Fill the sink, then release it. Fill the basin halfway, then pull the stopper. Watch the drain flange, tailpiece, and P-trap while the full volume rushes through. A surge of water finds leaks that a trickle misses.
- Check the wall penetration. Shine a flashlight where the drain pipe enters the wall. Wetness here means the leak is in the wall drain connection, which is harder to reach and worth calling about.
- Feel with dry toilet paper. Wrap a dry strip around each joint. Toilet paper shows even a few drops clearly, revealing seeps your eyes would miss.
A vanity cabinet is a dark, warm, enclosed box. Any leak inside it becomes a mold incubator within days, which is why under-sink leaks deserve same-day attention.
If the towels stay dry through every test but the musty smell persists, water may be traveling from somewhere else: a shower on the other side of the wall, a tile problem nearby, or a supply line leak inside the wall. At that point, professional water leak detection with moisture meters and thermal imaging can trace the path without tearing the vanity out.
Fixes That Actually Last
Once you know the source, match the fix to the failure. Quick patches that skip the root cause always come back:
| Cause | Where to Look | Lasting Fix |
|---|---|---|
| Dripping slip nut on the P-trap | The curved trap under the sink, at each nut | Disassemble, replace the slip washers, reassemble hand-tight plus a quarter turn |
| Corroded supply hose | The flexible lines from wall valves to faucet | Replace both hoses with braided stainless steel lines and new shutoff valves if the old ones seize |
| Seeping drain flange | Where the drain meets the sink bowl | Remove the flange, clean off old putty, reseat with fresh plumber's putty or silicone |
| Water under the faucet base | The deck where the faucet sits | Pull the faucet, replace the base gasket and O-rings, reseat and seal |
| Seeping shutoff valve stem | The small valves on the wall pipes | Tighten the packing nut slightly; if it still seeps, replace the valve |
| Cracked tailpiece or trap | Plastic drain parts showing hairlines | Replace the damaged section; do not tape or epoxy pressure-carrying joints |
Two rules of thumb for under-sink work. First, always replace both supply lines when you replace one; if one hose is at the end of its life, the other is too. Second, if you have to shut off the main water valve because the under-sink valves will not close, that is your signal to replace those valves. Valves that do not work are a liability, not a fixture.
When the Cabinet and Floor Are Already Damaged
Vanity leaks earn their reputation from what they destroy silently. Particle board cabinet floors can lose structural strength in weeks of repeated wetting. Once the bottom shelf of a vanity is soft, swollen, or delaminating, drying it out does not restore it; the material is permanently compromised and needs replacement.
The bigger question is what the water reached beyond the cabinet. Water runs downhill and outward: into the subfloor beneath the vanity, into the wall cavity behind it, and into the baseboards of the surrounding bathroom. Before you install a new vanity over the old footprint, confirm the surrounding materials are dry. A moisture intrusion inspection with pin meters and a thermal scan maps the wet zone so the rebuild covers the full damage, not just the visible part.
If you are replacing the vanity anyway, consider upgrading to a wall-mounted vanity or a cabinet with a solid PVC or metal bottom. The next leak, if there ever is one, will show itself on the floor instead of hiding inside a wooden box.
Preventing Future Vanity Sink Leaks
- Look inside the cabinet every few months. Open the doors, shine a light around, and feel the cabinet floor for softness.
- Replace rubber supply hoses with braided stainless steel. It is one of the cheapest, highest-value upgrades in a bathroom.
- Exercise the shutoff valves twice a year. Turn them off and back on so they do not seize. If one will not move, plan its replacement.
- Do not store heavy items against the pipes. Cleaning bottles knocked against a slip nut are a classic cause of slow new drips.
- Keep a leak tray or mat under the trap. A waterproof tray catches the first drips and makes them visible instead of hidden.
- Recaulk the sink-to-counter and counter-to-wall joints when the caulk pulls away. Water from the countertop finds every gap.
- After any plumbing work under the sink, check the cabinet again a week later. Disturbed fittings settle and sometimes loosen.
Stop a Vanity Sink Leak Before It Costs a Cabinet
A vanity sink leak starts small and stays hidden, which is exactly why it causes so much damage. The diagnosis takes ten minutes with dry towels and a flashlight. Most fixes are simple parts: washers, supply hoses, putty, and gaskets. The expensive part is always the delay, not the plumbing.
If you cannot find the source, or if the cabinet floor, wall, or subfloor already feels soft, call ProLine Leak Fix Pros at (425) 380-0028. We trace hidden bathroom leaks across Lynnwood and Snohomish County, so you fix the leak and the damage in one informed pass.